Objective
The purpose of this tutorial is to help you create a Google Merchant Center account and thus enable you to run Shopping campaigns. This type of campaign is useful for e-commerce owners who want to promote their product catalog. In Merchant Center, you will send the XML link of your products in order to promote them.

So let's go step by step:
Stage 1/8
Open merchants.google.com and click on "Sign up". Use the e-mail account you have registered with Google Ads or Google Analytics to facilitate linking.
Stage 2/8
Fill in the short form with information about your company: location, company name and website URL. Select the options for contacting Google that suit you (these are not obligatory).
Step 3/8
Then click on "Continue" and accept the Google Merchant Center terms of service.
Stage 4/8
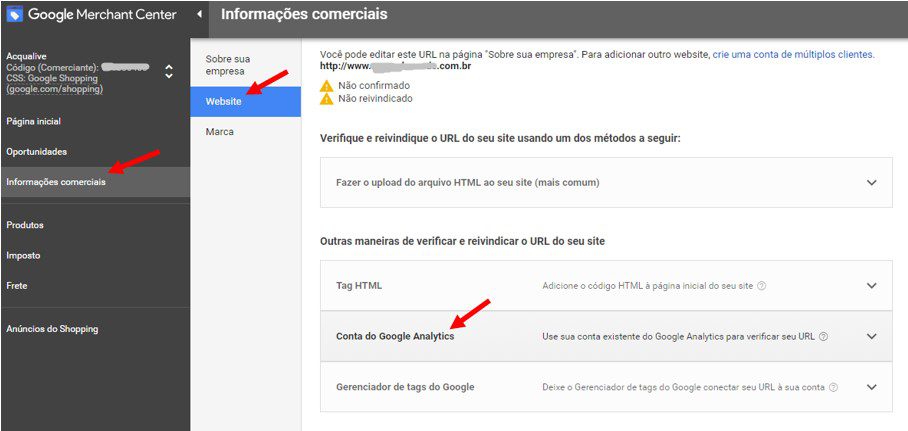
The next step is to verify your domain, i.e. to prove that you really own the site. Verification tells Google that you are the authorized owner of the URL. To do this, simply go to the Merchant Center and, in the side menu, click on "Commercial Information" -> "Website" -> Confirm your Domain.
You can choose the best method to verify your property. We recommend the alternative method "Google Analytics". Click on this option, you will be redirected to the domain verification page, wait for the confirmation message.
If this doesn't work, another option is the "Google Tag Manager".
 "Website" -> Confirm your Domain. " width="908″ height="431″>Step 5/8
 "Website" -> Confirm your Domain. " width="908″ height="431″>Step 5/8
You have now confirmed your site, but you still need to claim it. To do this, open your Merchant Center account and click on "Business Information" again in the side menu. Click on "Website" -> Choose the option to claim your website. Repeat the previous process.
Step 6/8
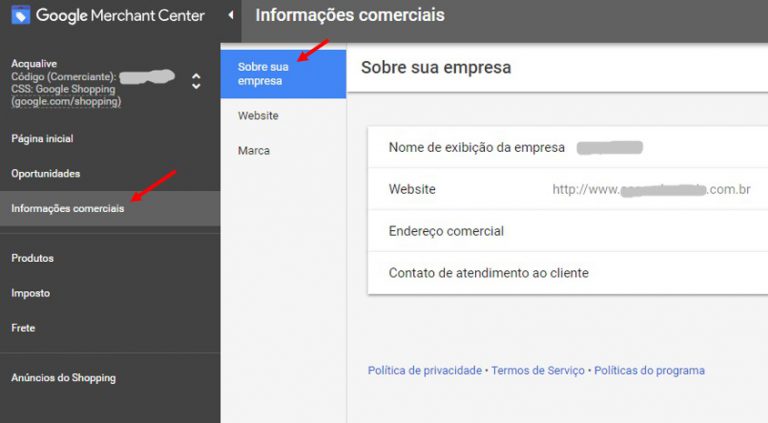
That's it, your site is now confirmed and claimed. You can fill in information about your company by clicking on the side menu "Commercial Information" -> "About your Company".
"About your company"." width="768″ height="423″>Step 7/8
 "About your company"." width="768″ height="423″>Step 7/8
Then send Pareto your Merchant Center ID and your registration email. Then we can create shopping campaigns for your company!
Stage 8/8
Now upload your product feed via the XML link sent by your e-commerce platform. This link contains all the important product information, such as name, description, item ID, stock quantity and more.
In the Merchant Center side menu, click on "Products" -> "Feed" -> Click on the "+" symbol and upload your feed. If you prefer, just send Pareto the XML link and we'll do it for you!