::MOTIVATION::
Events are any type of action within a website that can be measured independently of a page load (with a URL change), such as a button click. In this way, we can measure whether our site is meeting our objectives and what the points for improvement might be.
Let's say our website is focused on registering users, which we call Leads, and we want to measure how many forms come from Google Ads each day. The situation can be more complicated than it seems when we don't have a page after the purchase confirmation, the so-called "Thank You Page". Then our monitoring will only depend on the form submission, on the click of the "Submit" button.
In this case, how could we measure the number of registrations sent? Through the button click event! This event can be installed directly in the site's source code or via Google's Tag Manager.
In this article, we'll teach you how to set up events using Google Tag Manager, but first, let's understand how the structure of an event works in Google Analytics.
::STRUCTURE OF AN EVENT::
An event is made up of the following parameters:
- Category
- Action
- Label (optional, but recommended)
- Value (optional)
Within Google Analytics, we can track events in the Behavior Tab:

Below, we'll explain what each of these parameters means.
Category
The category is the parameter you use to group together various different actions within the site.
Example:
Event 1
Category: Registration
Action: Click on the "Send" button
Event 2
Category: Registration
Action: Click on the "Submit" button
Note that the category is the same in both events, which is lead registration. What differs is the way this registration comes into your data.
Action
The action is what was done to generate that event, as seen in the previous example, it would be the "Button Click". It's important to note that this action is what we want to monitor, it's through it that we track the achievement of the goal.
Label
This parameter provides additional information about the event, such as which form sent the registration, making it easier to correctly identify the event.
Example:
Category: Registration
Action: Click on the "Send" button
Label: Home Page Form
Value
This parameter is the value of the event, and must be in numeric format, unlike the previous ones which must be of string type. This field is used when we need to know some information about the value of the action. In the case of Leads, it is not often used, but when it comes to e-commerce, it is interesting that this field contains the value of the purchase.
::HOW TO SET UP AN EVENT USING GOOGLE TAG MANAGER::
Note: You must already have a Google Tag Manager account and the GTM code properly installed on your site.
Step 1/11 - Open Google Tag Manager.
Step 2/11 - Click on your account.
Step 3/11 - Click on Tags and then click on "New".

Step 4/11 - Click on "Tag Configuration".
Step 5/11 - Select the "Google Analytics - Universal Analytics" tag.
Step 6/11 - Under Follow-up type, select "Event".

Step 7/11 - Fill in the event fields. Remember that Category and Action are mandatory. It's worth noting that you can define the names of the "Category" and "Action" as you see fit, just remember to use exactly the same names when creating the goal in Analytics.

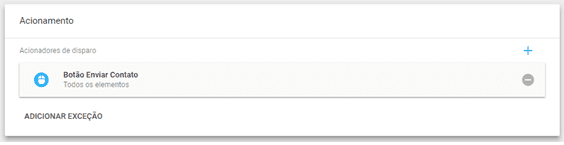
Step 8/11 - Click on "Trigger"
Step 9/11 - Select the trigger you want to fire the event. For example, we want to know how many registrations have been completed, so my trigger would be the click on the "Submit" button on my form.
Step 10/11 - Give your tag a name and then click on "Save".
Step 11/11 - Now just click on publish and you're done!
Events have up to 48 hours to be computed in Analytics, so it's best to wait for a little anxiety in this process, lol.
If you want to learn how to turn this event into a goal, we'll teach you too! Just click on this link.