Imagine being able to understand what was said in videos or audios in foreign languages and having your own personal translator, who helps you figure out what was said through speech recognition. With the help of Tess AI, Pareto's Artificial Intelligence, this is possible.
In this tutorial, we're going to explore one of the User Inputs in detail. This content is classified as intermediate, so it is essential that you have completed at least the Text Templates Tutorial. If you haven't already, you can access it by clicking here.
If you've already read this, we're guessing you already have a basic understanding of creating templates, so we can go a little further and delve into this topic of input groups.
Learn How to Use the Upload File Field in Your Templates
To begin your discovery of Tess AI, in this tutorial we'll cover one of the fields below and its applications in the "Upload File"template.
Input Field: by sselect this type, you enable the user to enter short texts for more objective answers.
Textarea field: you can enable the user to insert large blocks of text if your template requires a lot of information.
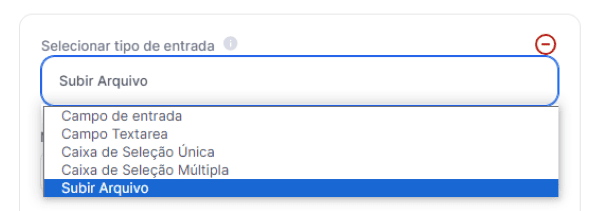
At this point, we will select the input field, as shown in the image below:
In this case, the input field will be intended for situations in which you want to send audio or video files, which is a crucial functionality in everyday life, and which integrates perfectly with an Advanced AI Step, such as audio transcription.
To recap the information that will help you organize and bring your template ideas to life, keep the following steps in mind:
- Elaborate the idea;
- Develop a command prompt;
- Test the prompt with the Tess AI assistant;
- Refine the prompt;
- Create the template.
For the initial fill-in: "My New AI", the process is intuitive and you should already know how to fill in and why you need to fill in each field.
So, just to confirm, here's how this field was filled in:
1. my new AI
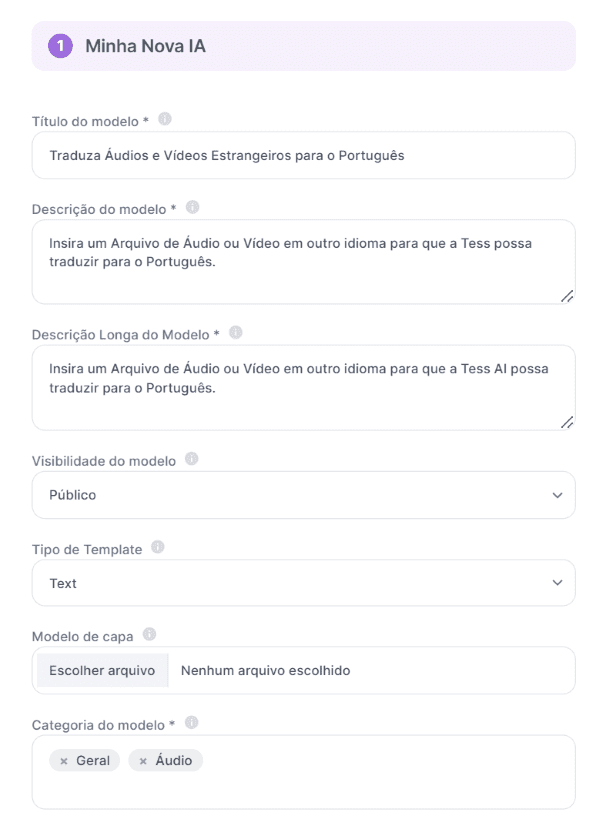 Idea: A template that can analyze an audio or video file in a foreign language and translate it into Portuguese. Just send the file and receive all the formatted content.
Prompt Approved: "Transcribe every word in the **converted-file**.
Critically, don't make up or add words, show exactly what's in the audio. Then translate everything into Portuguese. Result:"
Notice that we have specified only one piece of input information that will need the field: "Upload File", as mentioned in the prompt and in the Idea:
**converted-file** will be the product of an analysis of the file sent. As we'll see below.
This process differs from other entry groups in that it involves the inclusion of an Advanced AI Stage, so we'll take you through it step by step so you can follow along.
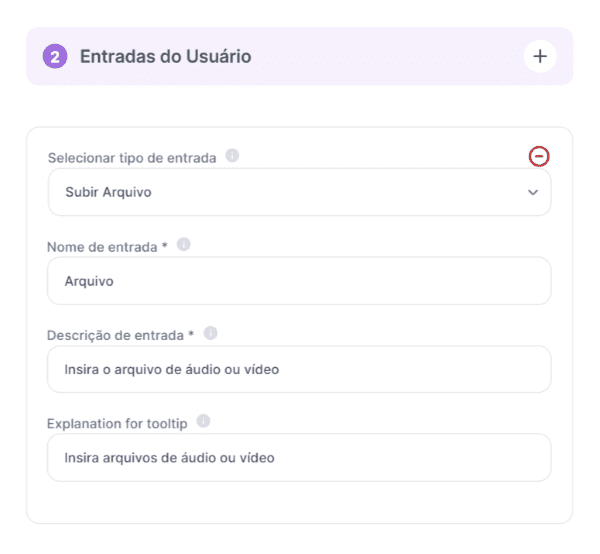
Under User Inputs, select the "Upload File"optionand fill it in as usual, in which case the input field will just be called "File".
2. User Inputs
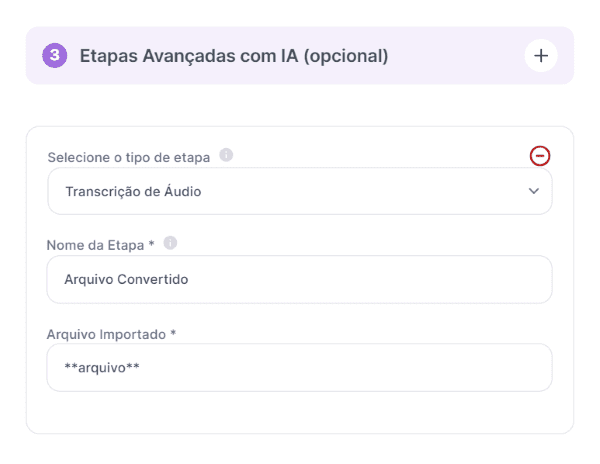
 For this template, you'll need a step in connection with another AI, one that transcribes the audio so that it can be converted to text.
So, under "Advanced Steps with AI", select the "Audio Transcription"type, assign a new name to the transcript, in this case, "Converted File".
Finally, specify that the imported field is "File" which should be the same nomenclature as the "Upload File" field you created initially. This step should look like the image below:
3. Advanced steps with AI
 Enter the prompt information and click "Save", making sure that the "converted file" is the one that will be taken into account when executing the command, as shown in the screen below:
4. Your AI Prompt
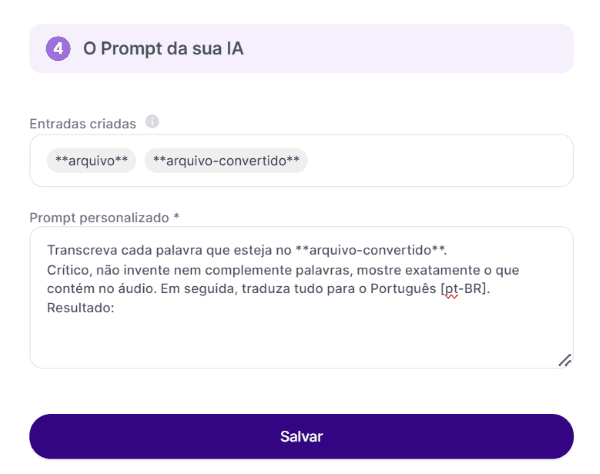 Note that if you don't use the entries between asterisks inside the Prompt, what the user types in the Input Group won't be used. So make sure it is filled in exactly as in the "Entries Created", including the **asterisks**.
Once your template has been sent for approval, simply use it via the link provided in "My IAs" and test your new creation .
My AIs
The template for this tutorial was tested with a video in Chinese dialect and it looks like this:
 You can validate your prompt after approval by testing, editing and refining it until it looks just like you.
This is another tutorial on creating templates using Tess AI. Be sure to follow our updates and resources as we continue to expand the possibilities of AI.
A world of amazing possibilities awaits you! Start creating your Artificial Intelligence right now.