Introduction
WordPress is an open website development platform. Today, according to research carried out by W3Techs, it is the basis for 30% of all websites on the internet.
One of the reasons for WordPress's popularity may be its practicality in creating websites, since you don't need to be a great developer to create a beautiful and functional site for your purposes.
However, after publishing a website, many people seek to rank it better and better in Google searches and to optimize their own website and advertising campaigns.
There are several Google tools that support this. One of them is Google Tag Manager, Google's tag manager.
Through it, we can track website data for Google Analytics and Google Ads, among other platforms. As well as tracking traffic data, we can see conversions, whether it's sales in your e-commerce or lead registration.
Below, we'll explain step-by-step how to insert the GTM code into your WordPress site. Check it out!
How to insert the GTM
Linking Google Tag Manager to your WordPress site is very simple, just follow the steps below:
Step 1/7
Enter yourdomain/admin and log in to yourWordPress account.
Step 2/7
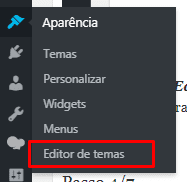
Enter the area Appearancearea in the side menu.

Step 3/7
Find the Theme Editor. If you don't see this option, you're probably not an administrator of the site. Ask the site owner for administrator access, or send them this tutorial to install GTM.
Step 4/7
Inside the editor, you will see a list of files in the right-hand menu of the page. Click on the file called "Theme header" (header.php).
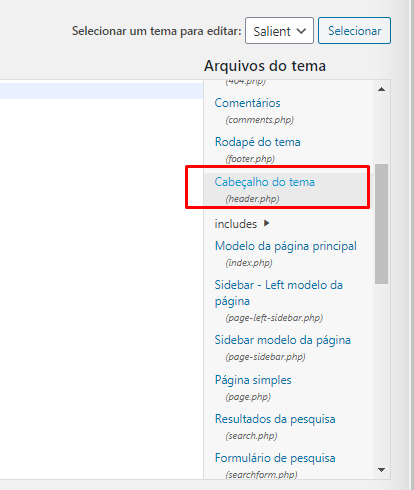
In some cases, this action is not allowed or they use a different name for the file. Therefore, you need to familiarize yourself with the files in your theme template, which are responsible for creating the headers and navigation of your site.
Step 5/7
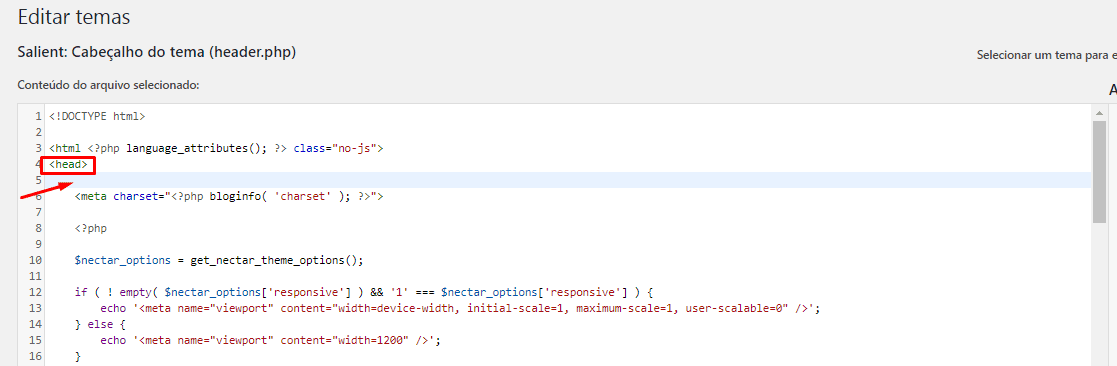
Com o arquivo header.php aberto, adicione o código do contêiner do seu GTM respectivo à <head> na seção header. Exatamente no topo do elemento, logo depois da abertura da Tag.
Step 6/7
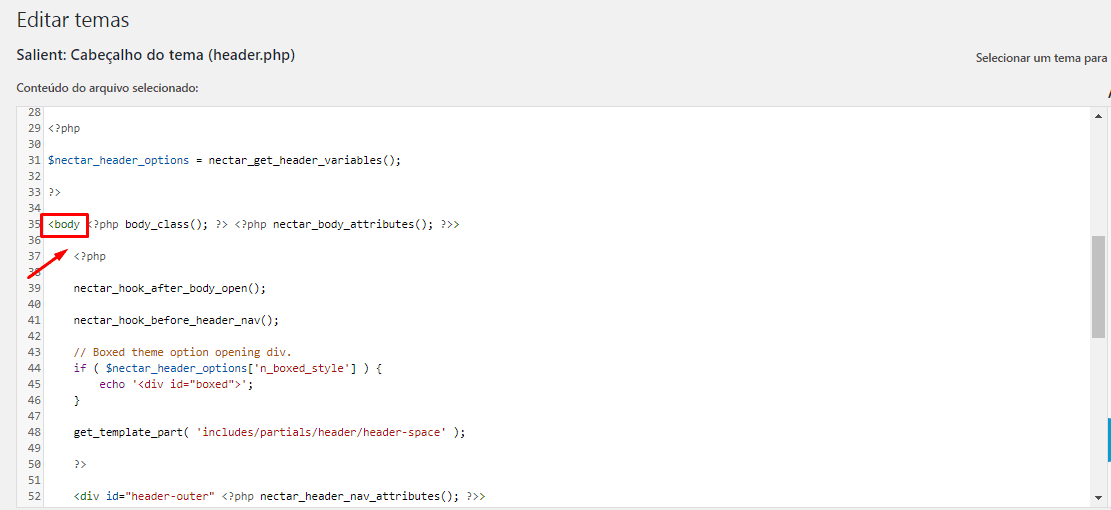
Da mesma maneira, adicione o segundo código, respectivo ao <body>, na seção header. Bem no topo do elemento.
Step 7/7
Remember to save the changes. It is very important that you are careful when making changes to the header.php, as this is a crucial file for the functioning of your site.
If an error occurs, the site code may break or the tracking code may not work properly.
But don't worry; to prevent this from happening, simply make a copy of the code files before making any changes. That way, if the changes go wrong, you can restore the original code.