

Imagine having a travel planning tool at your disposal that adapts perfectly to your wishes and preferences. Let's create that now with the help of Tess AI.
In this tutorial, we'll explain Input Groups in more detail. This content is considered intermediate level, so it is essential that you have at least followed the Text Templates Tutorial.
If you've read this, we're guessing you already have a basic knowledge of creating templates, so we can go a little further and delve into the available input groups.
If you haven't already followed the step-by-step instructions on how to create a simple text template, check out this guide Create Your Text AI with Tess AI.
Learn How to Use Single and Multiple Selection Fields in Your Templates
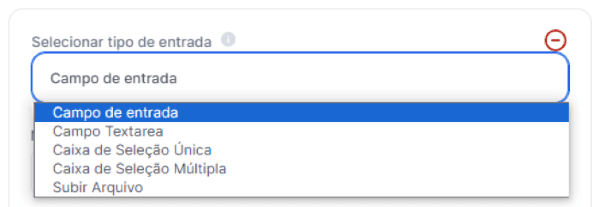
To start your discovery at Tess AI, we will look at two input groups and their applications in a template:
Single checkbox: if you want to limit the user's response to just one from a list of options, simply enter each one separated by a comma in the entry description.
Multiple selection box: if you don't want to limit the user's response, create a list of options, inserting each one separated by a comma in the entry description. The user will then be able to choose more than one option.

Now let's recap the steps to give shape and life to your template ideas. To do this, always remember:
- Elaborate the idea;
- Develop a command prompt;
- Test the prompt with the Tess AI assistant;
- Refine the prompt;
- Create the template.
In this tutorial, we'll start with Step 5. If you need to study the previous steps, you can follow along step by step by clicking here. by clicking here.
For the initial fill-in: "My New AI", the process is intuitive and you should already know how to fill in and why you need to fill in each field.
So, just to confirm, here's how this field was filled in:
1. my new AI
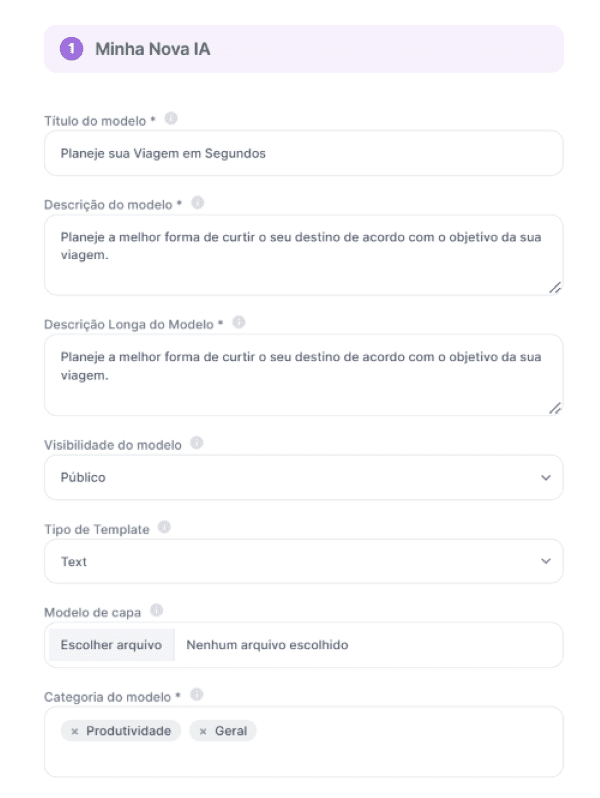

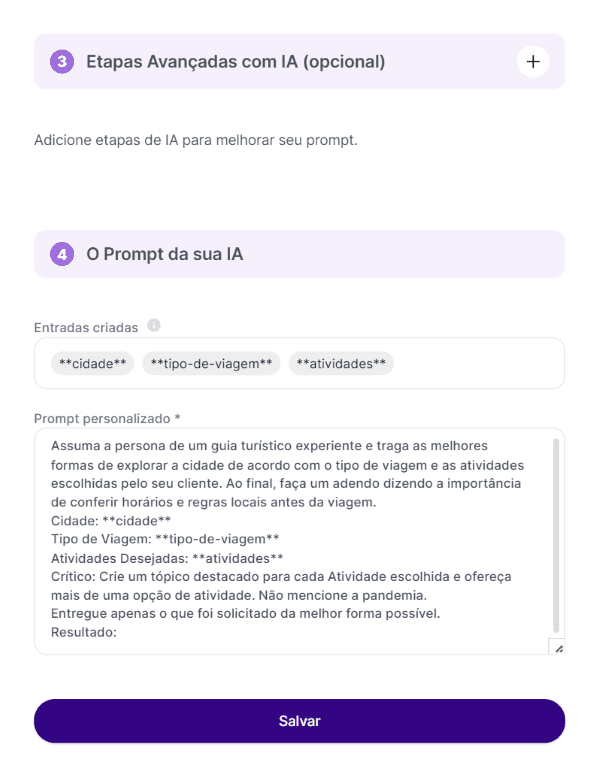
Prompt Approved: "Take on the persona of an experienced tour guide and outline the best ways to explore the city according to the type of trip and activities chosen by your client. At the end, add a note about the importance of checking timetables and local rules before the trip.
City **city**
Type of Trip: **type-of-trip**
Desired activities: **activities**
Critical: "Create a highlighted topic for each activity chosen and offer more than one activity option. Don't mention the pandemic. Just deliver what was asked for as best you can. Result".
Notice that we have specified three pieces of information that will need Input Groups, as mentioned in the prompt and in the Idea, so:
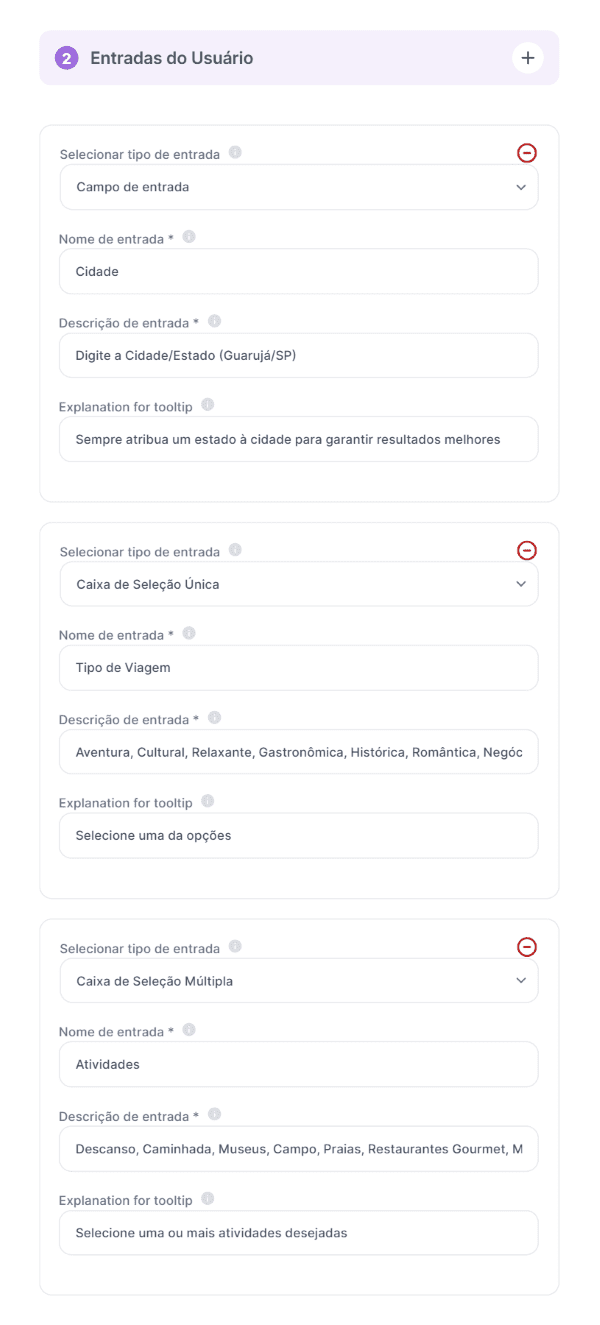
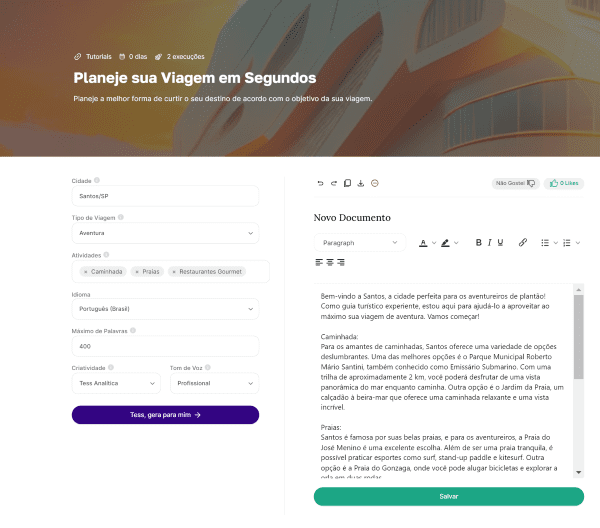
**City** will be a short text field, so we will use an "Input Field" so that the user only fills in the city and state they wish to travel to.
With regard to the **type of trip**, we want the user to select only 1 option, so the "Single Selection Field" will be very useful .
The options included will be: Adventure, Cultural, Relaxing, Gastronomic, Historical, Romantic and Business. Separated by a comma in the "Entry description", as shown in theimage below.
Finally, we assign some options that may be of interest to the user through the**activities**field, which in this case can be chosen in more than one way. To define the options we will use the "Multiple Selection Field".
The options included will be: Rest, Hiking, Museums, Countryside, Beaches, Gourmet Restaurants, Monuments, Business, Shopping, Bars and Nightclubs, Sports. Separated by a comma in the "Entry description", as shown in theimage below.
2. User Inputs

Stage 3 and 4

Once your template has been sent for approval, simply use it via the link provided in "My IAs" and test your new creation. The template for this tutorial looks like this:
My AIs

This is another tutorial on creating templates using Tess AI. Be sure to follow our updates and resources as we continue to expand the possibilities of AI.
A world of possibilities awaits you. Start creating your Artificial Intelligence now!


: O Que É, Aplicações e Exemplos")