

Do you know what makes TikTok, YouTube and Instagram so special? The interface? The functions? Definitely not. It's the content creators. They are the soul of the world's biggest digital platforms.
This is precisely why Pareto has launched perhaps one of the world's greatest innovations in Artificial Intelligence. Now, users can create and publish their own AIs on Tess AI without the need for codes and in a matter of seconds! All connected to the biggest AI platforms.

In this tutorial you'll be guided, step by step, so that you can start shaping the future of technology and sharing your creations with a growing community of over 150,000 users. It's time to unlock your full creative potential and turn your ideas into reality with Tess AI.
Quick Navigation
Creating an Idea
Creating a Text Template
1 - Detailing the Model
2 - Defining the Inputs
3 - Inserting Steps
4 - Ending the Prompt
Review
Creating an Idea

The command prompt is the central part of your AI. It will dictate what is created. So we'll start with it.
Let's say you have an idea that could make life easier for those thinking of starting a business, but don't know where to start.
To do this, we'll give AI a simple command: it should help entrepreneurs come up with business ideas based on their own skills.
The prompt would then look like this:
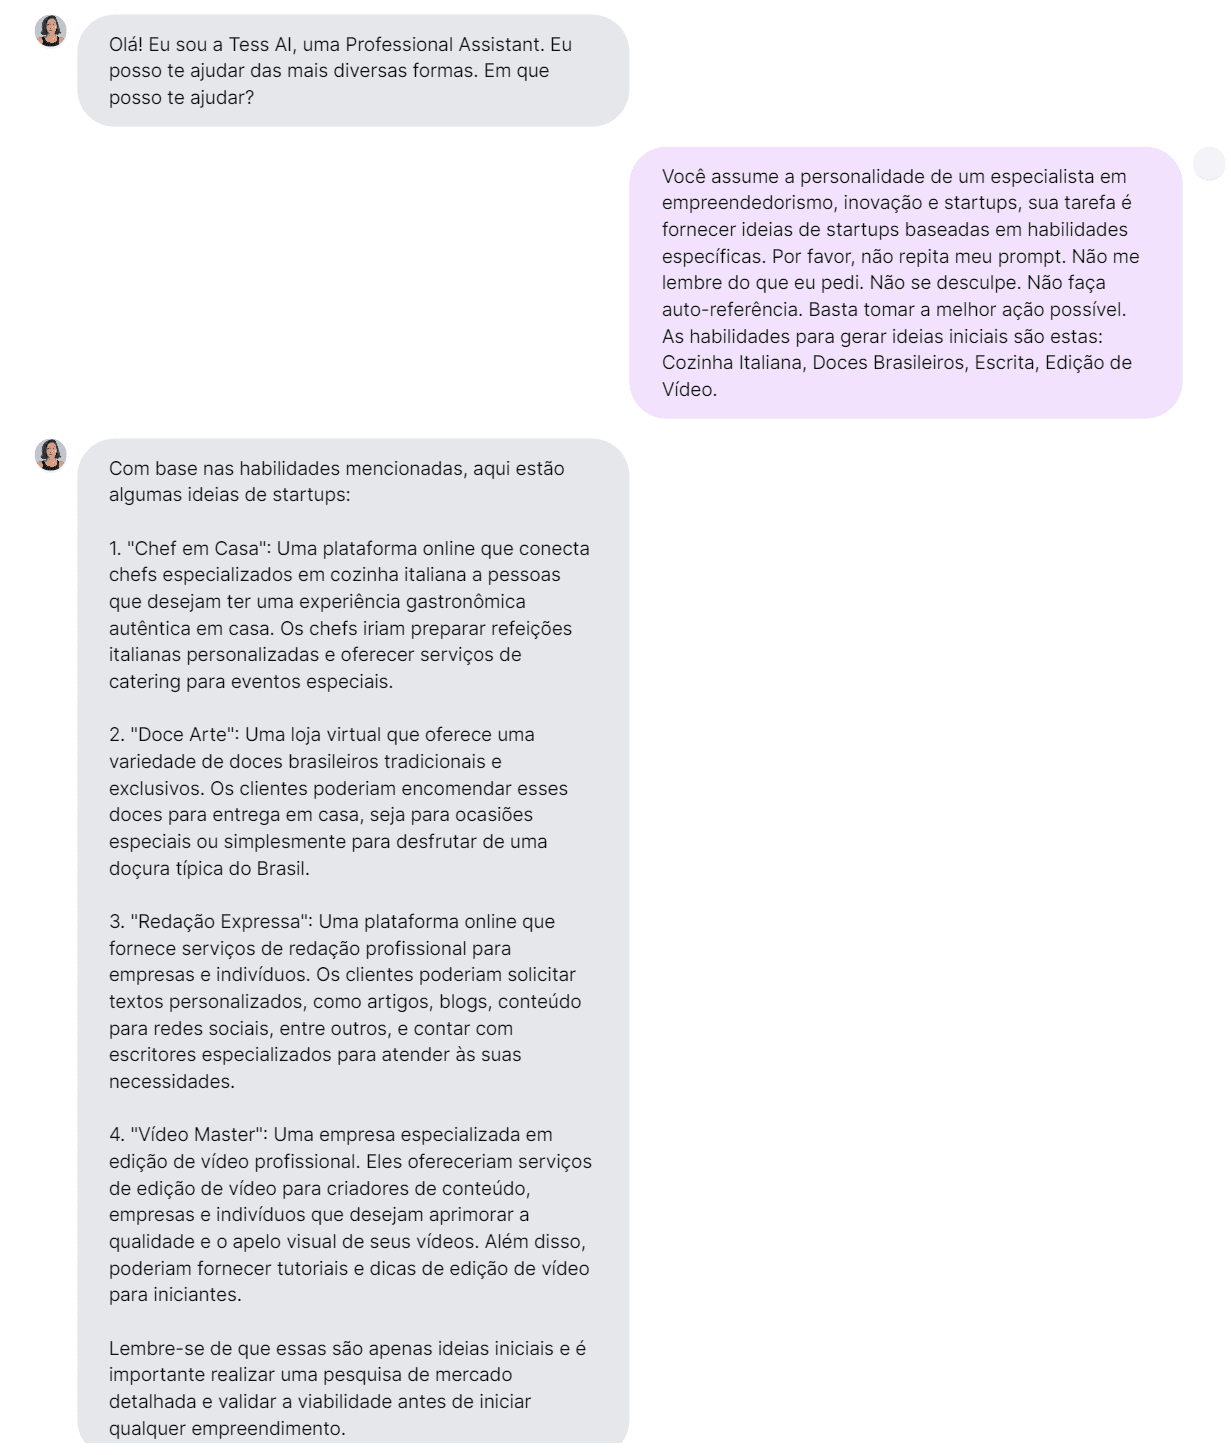
"You take on the persona of an expert in entrepreneurship, innovation and startups, your task is to provide startup ideas based on specific skills.
Please don't repeat my prompt. Don't remind me of what I asked for. Don't apologize. Don't self-refer. Just take the best possible action.
The skills to generate initial ideas are these: Italian Cooking, Brazilian Sweets, Writing, Video Editing."
Test Your Prompt with Tess
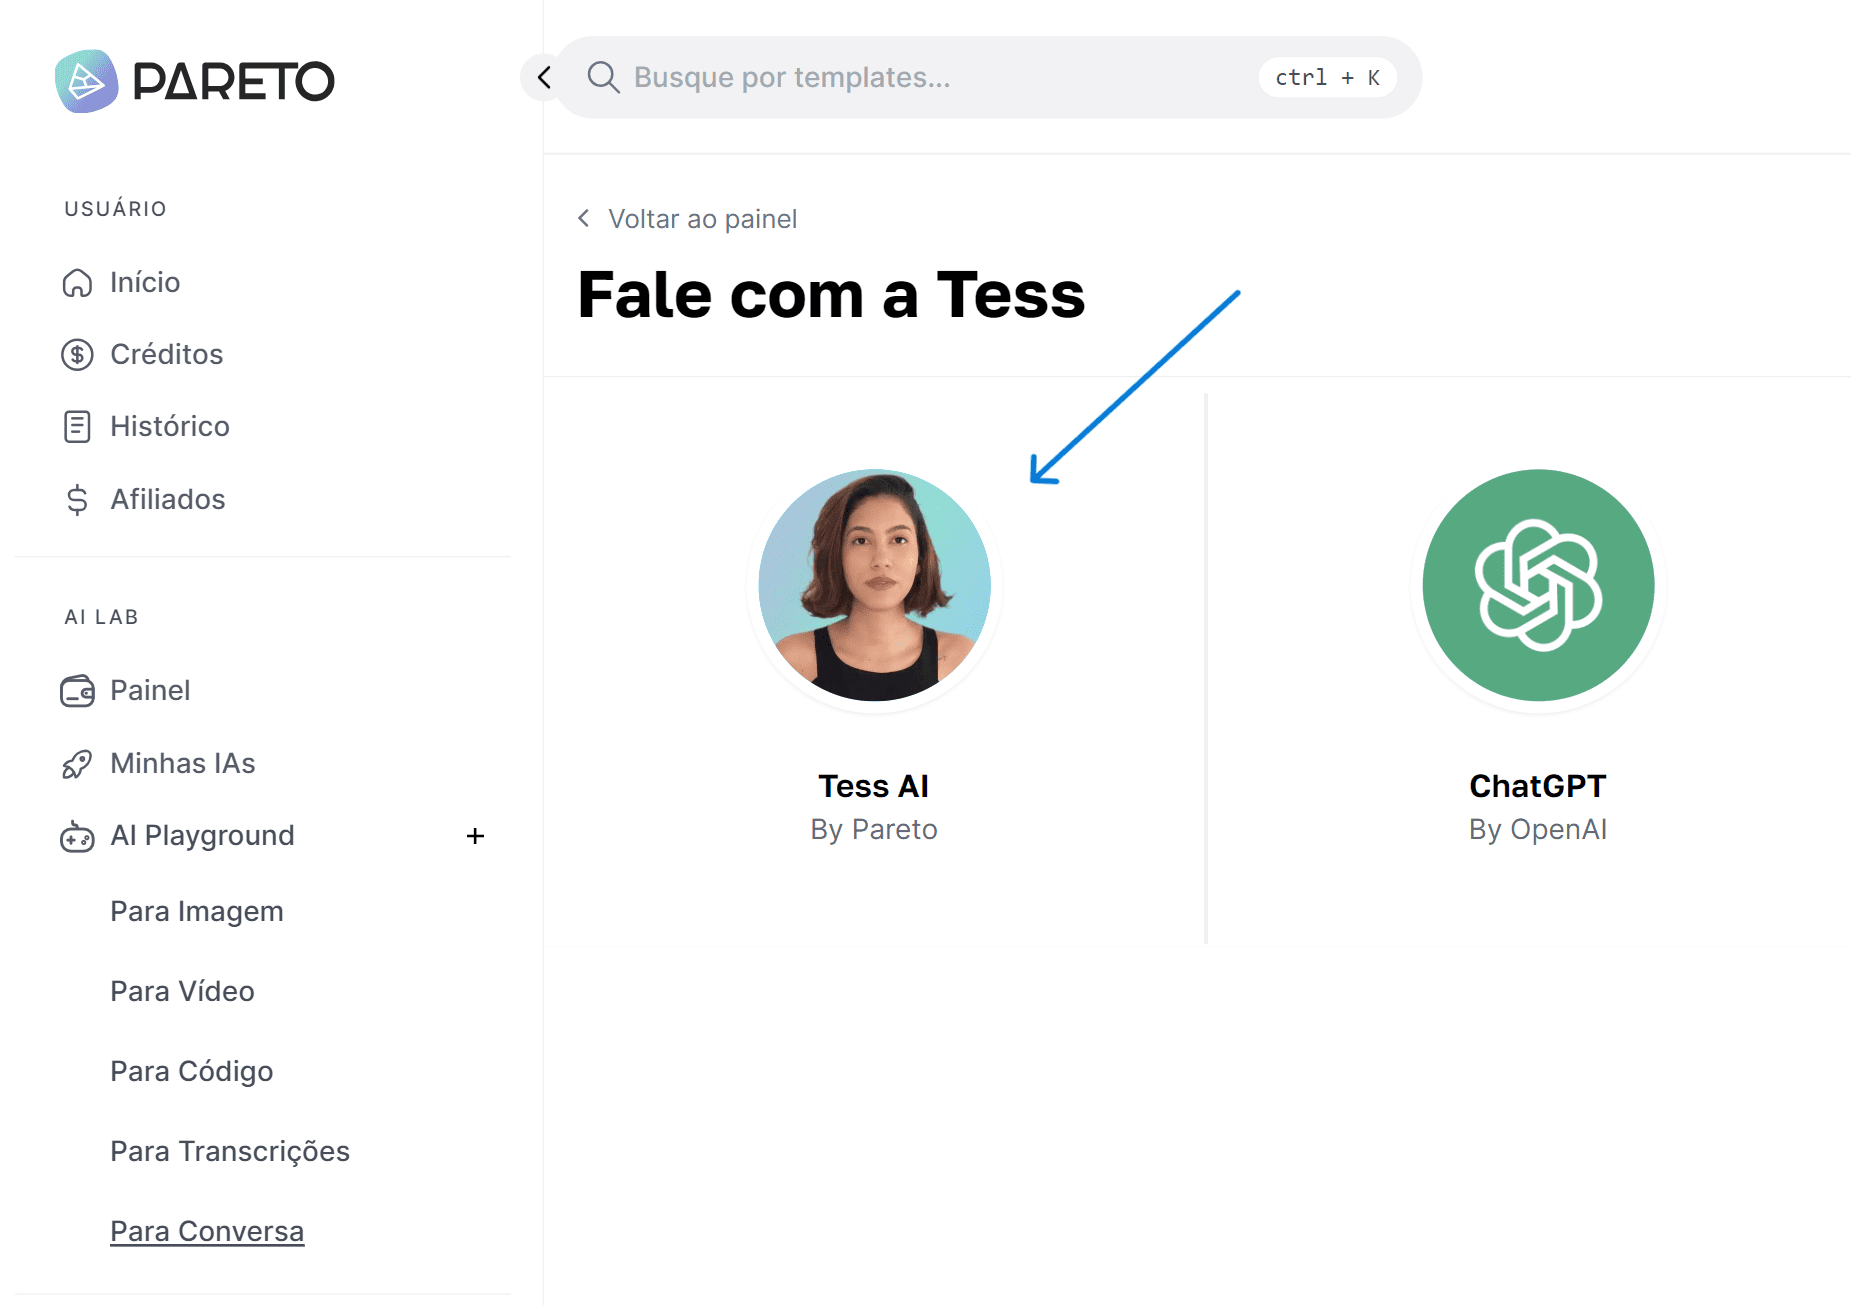
With your initial prompt in hand, simply test out your idea with the help of Tess AI by selecting "For Conversation" from the "AI Playground" menu.
Then select Tess AI as your professional assistant and enter the prompt you developed.

Check that the answers Tess brought to your prompt were satisfactory, otherwise you'll need to refine.

Refine the Logic Behind the Template
The Prompt in this case was satisfactory, but we could limit the number of ideas for this answer and even leave it up to the user to define how many ideas they want.
So the new prompt will be:
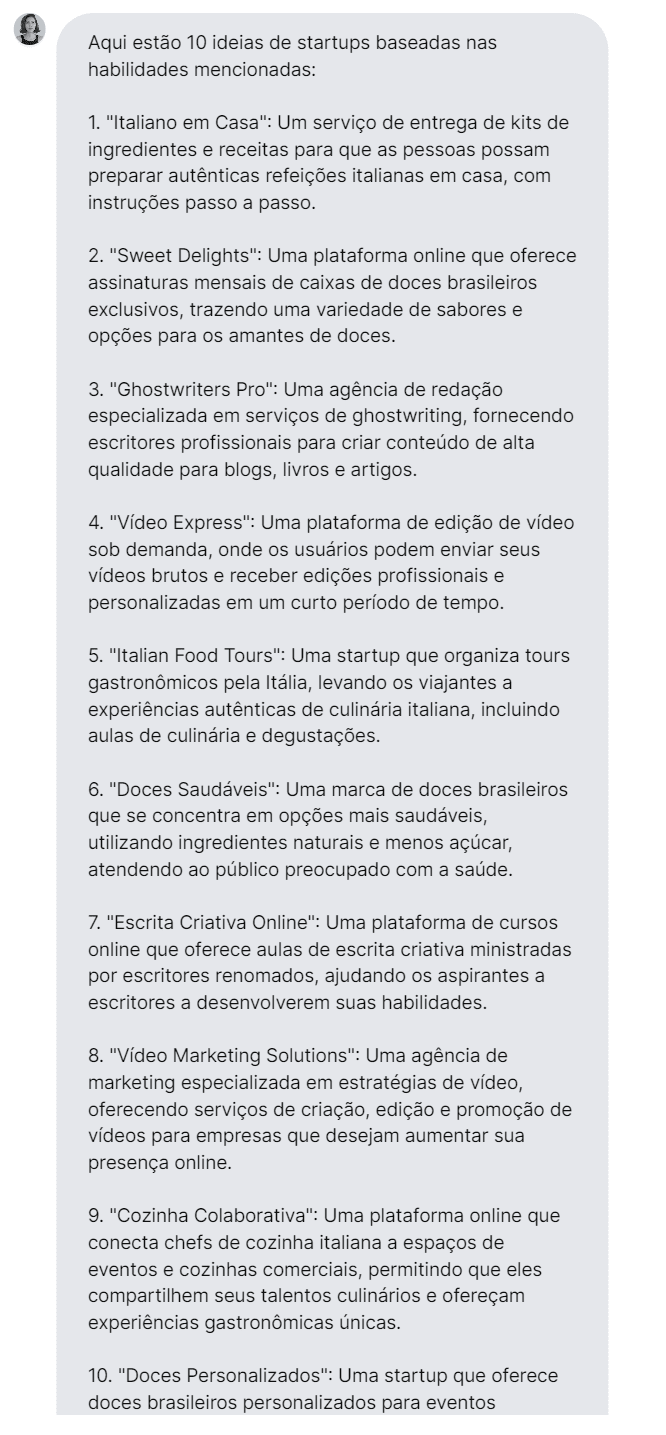
"You take on the persona of an expert in entrepreneurship, innovation and startups, your task is to provide startup ideas based on specific skills. Please don't repeat my prompt. Don't remind me of what I asked for. Don't apologize. Don't self-refer. Just take the best possible action.
The skills to generate initial ideas are these: Italian Cuisine, Brazilian Sweets, Writing, Video Editing.
The number of ideas will be: 10"
After refining, remember to test again with Tess AI to make sure the logic really works. As you can see, Tess AI generated 10 ideas based on the skills.

Creating a Text Template with Tess AI

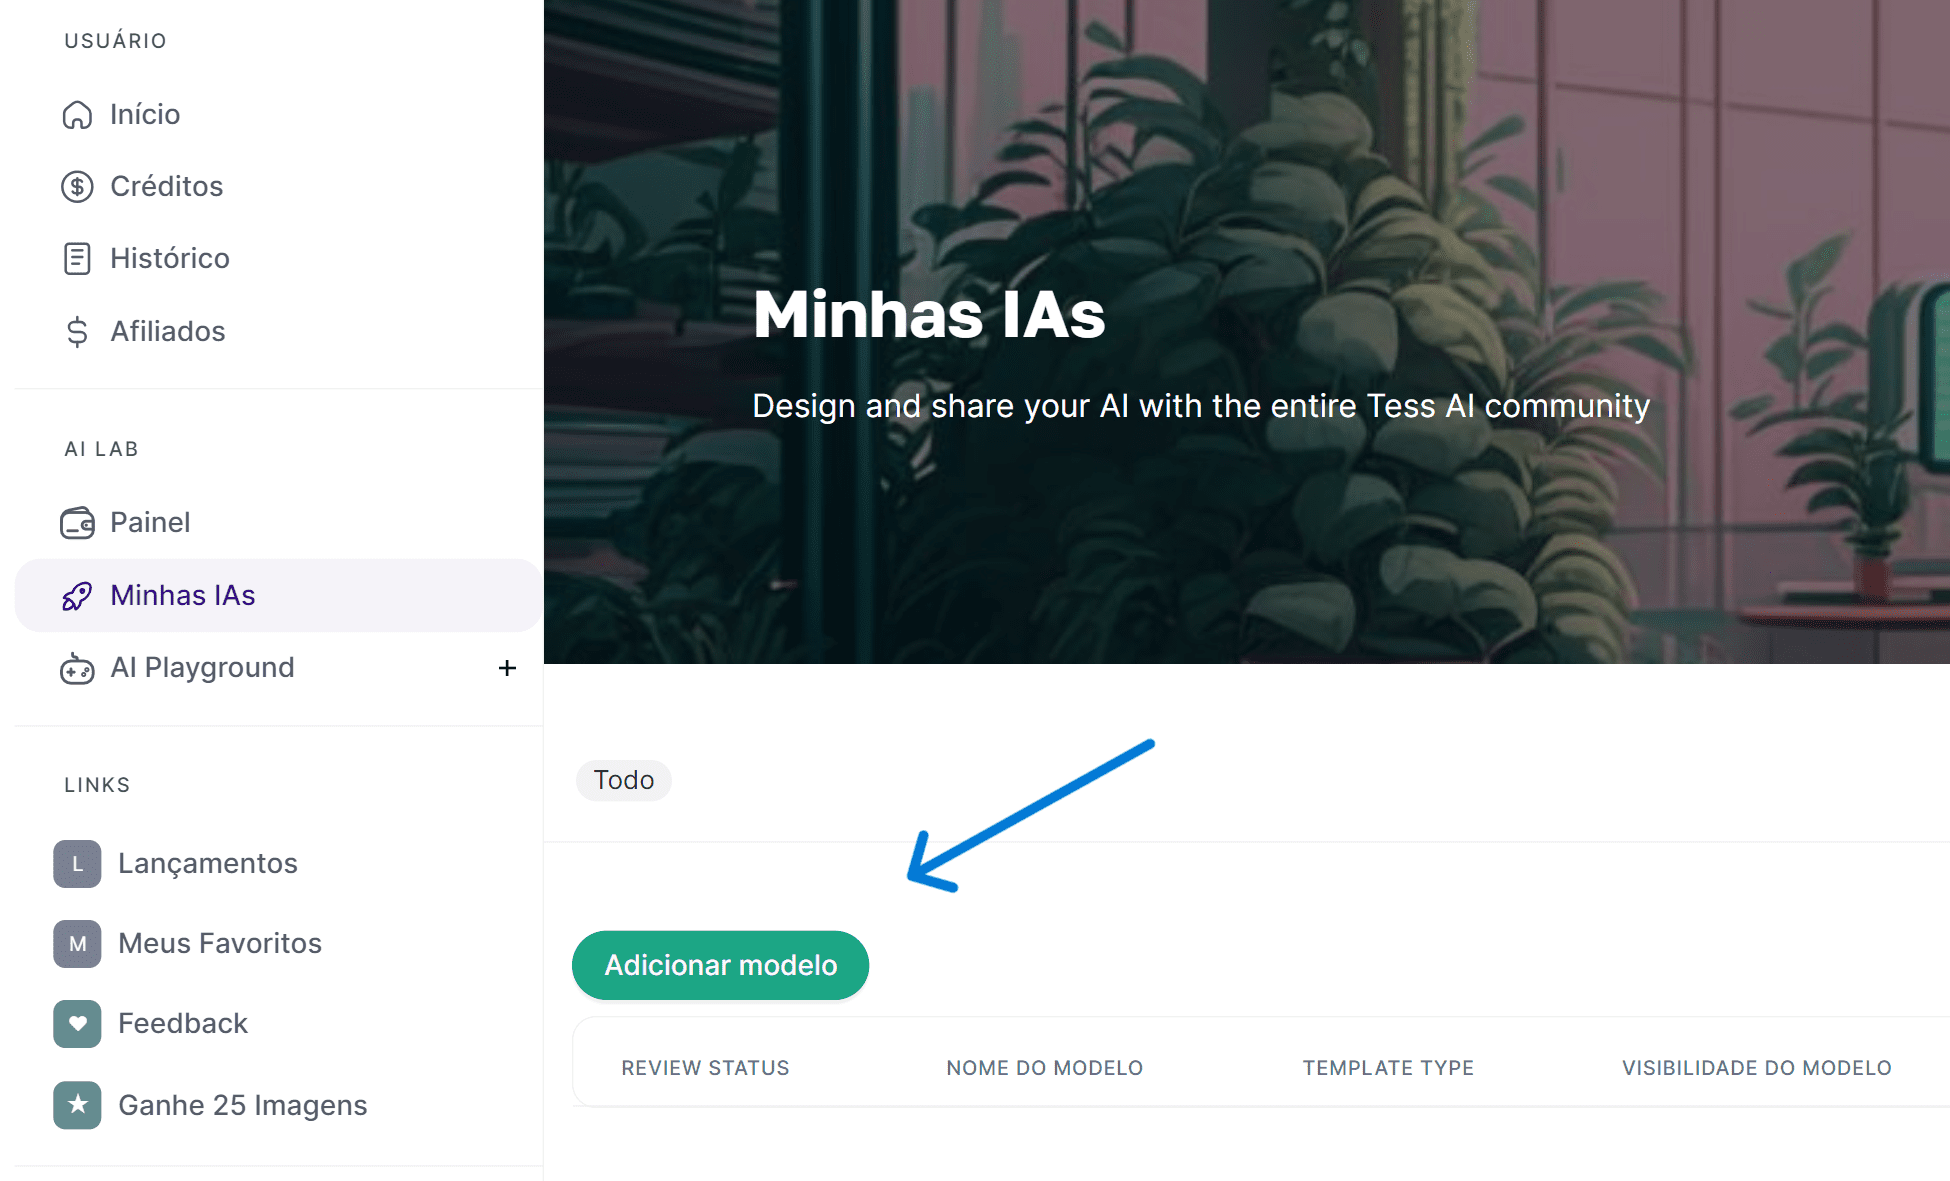
Now that the prompt is functional, it's time to bring a model to life , so the first step is to access your model area in the "My AIs" menu.
These initial steps are identical for both text and image templates. Therefore, cclick on "Add template" and start creating your personalized template.

1 - Detailing the Model
In this step you should create the initial details of the template, the name of the template, a short description and a long description to make it easier to understand.
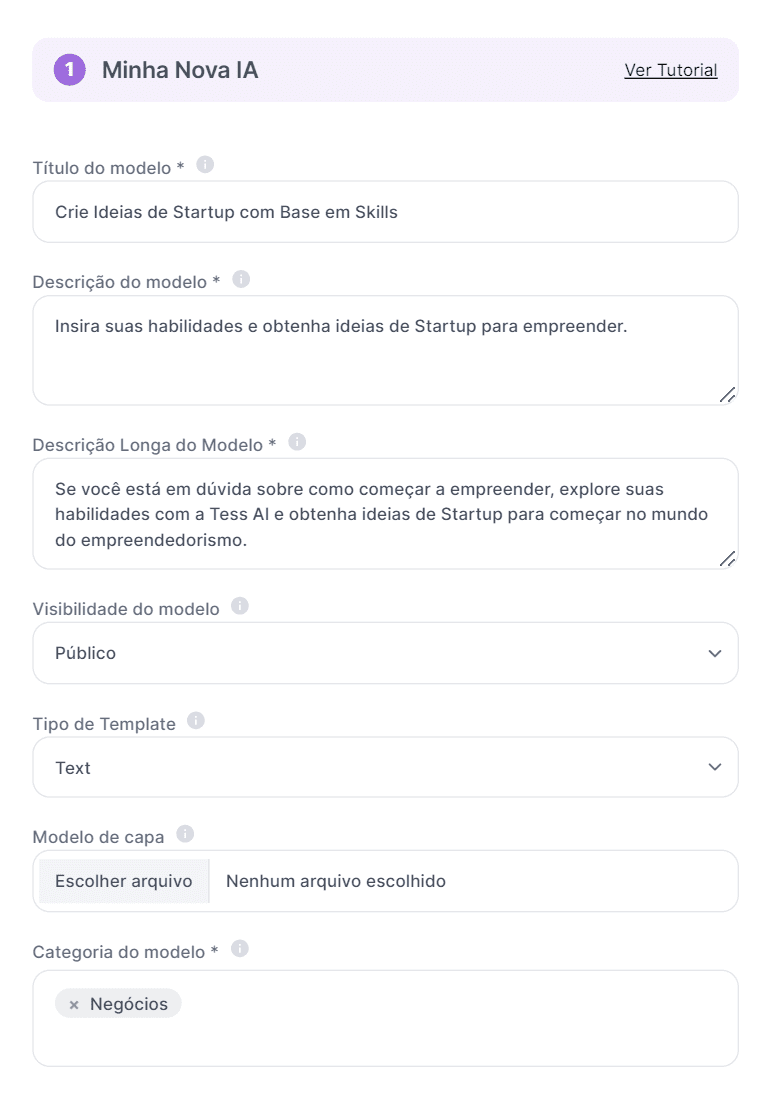

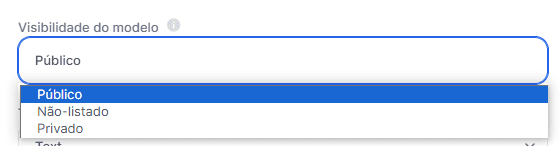

Set the template type between text and image templates.


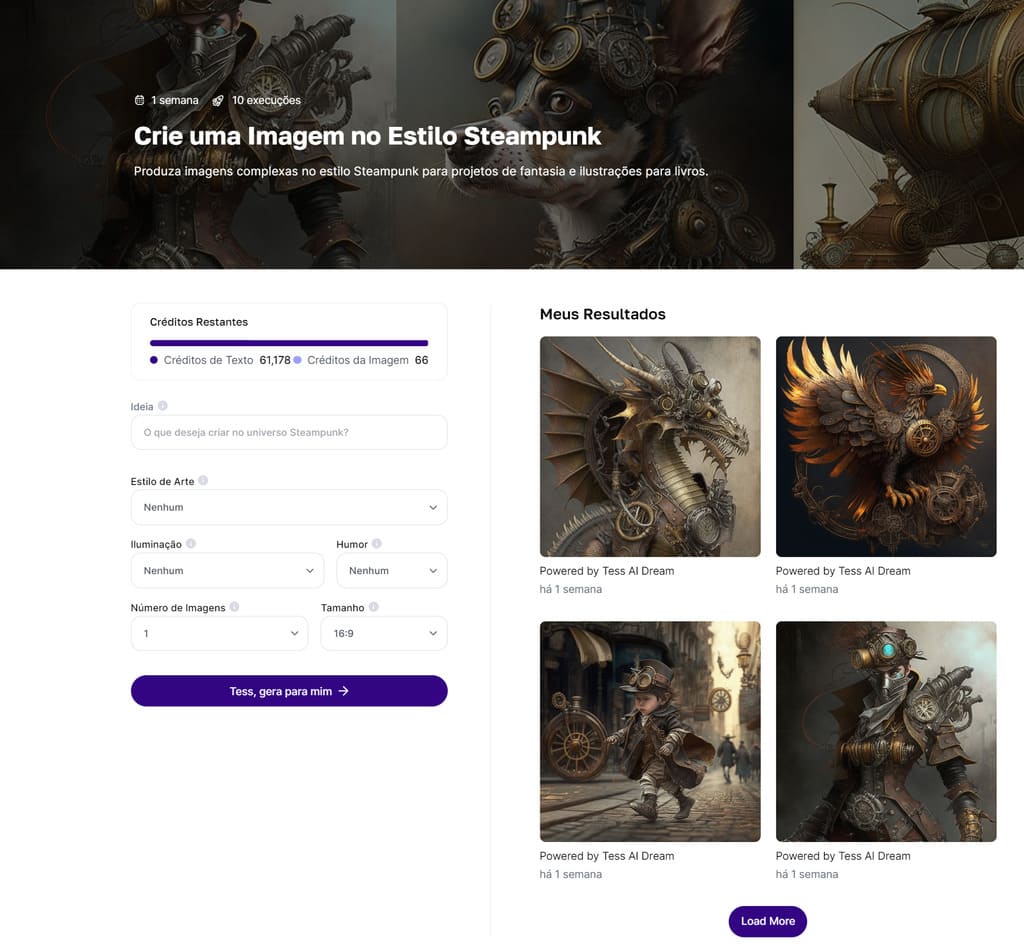
See step-by-step how to create an Image AI.
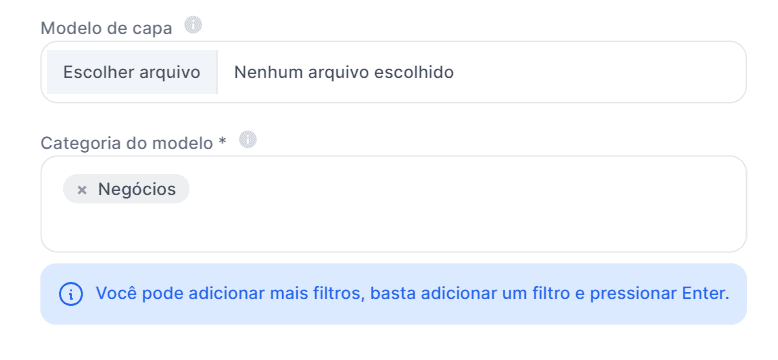
Finally, add details such as a cover, links to tutorials if you've created one, and categories.
The specifications indicated for the cover are 3840 x 768 px, it is worth remembering that the platform has a margin that adjusts according to the type of screen.
It is therefore advisable not to place text elements on the cover. For example, take a look at this image created to insert as the cover of a template and its display on the template:
Cover


Exhibition

If you leave the cover off, the template will display an automatic template instead, as in the example we are creating.
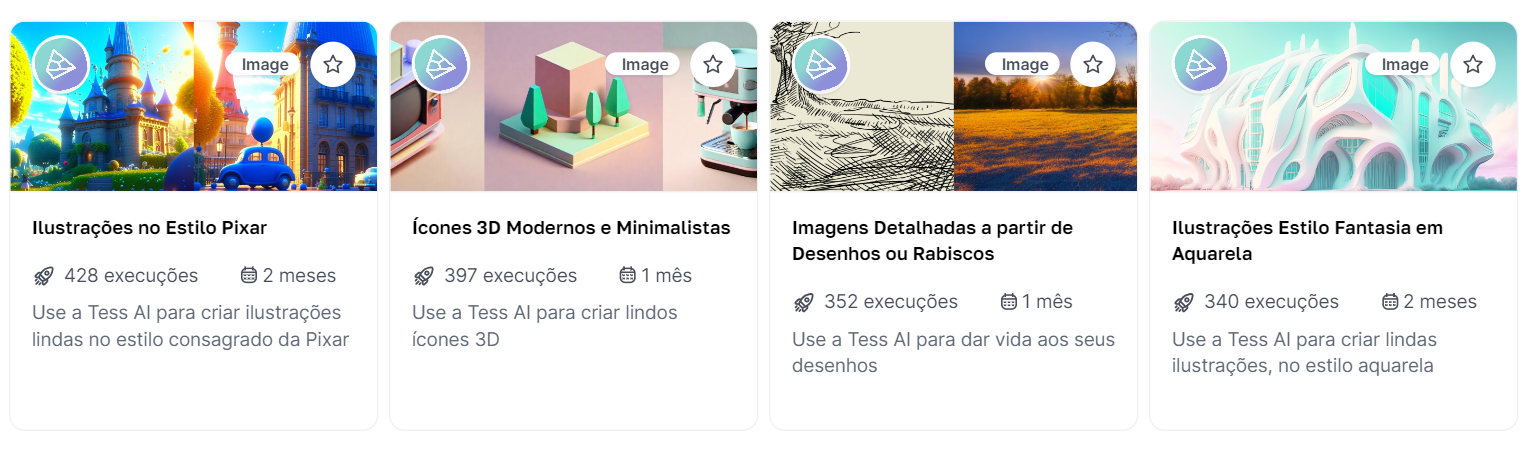
It's worth remembering that the cover is also an attractive element for differentiating your template through the thumbnails of the listing, as it appears when you click on Home.

In the case of the categories, you should choose the ones that best suit the function of your model, just choose one or more of the ones available on the platform.

2 - Defining the Inputs

It is at this stage that we create the fields that users must fill in. In the case of the prompt in question, these are "Skills" and "Number of Ideas"
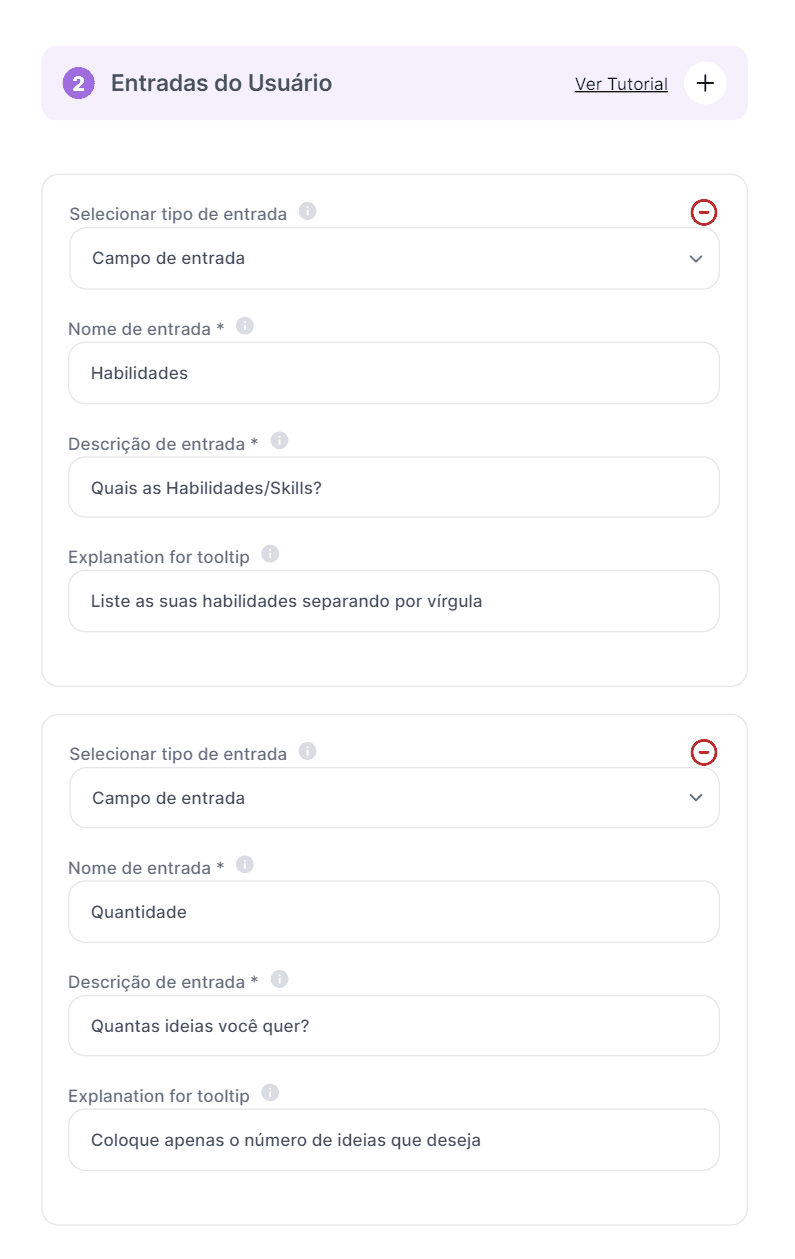


See the options:
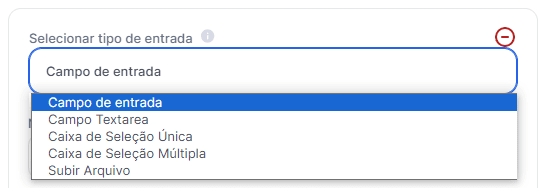
Input field: by selecting this type, you enable the user to enter short texts, for more objective answers.
Textarea field : with the textarea active, you enable the user to insert large blocks of text if your template requires more information.
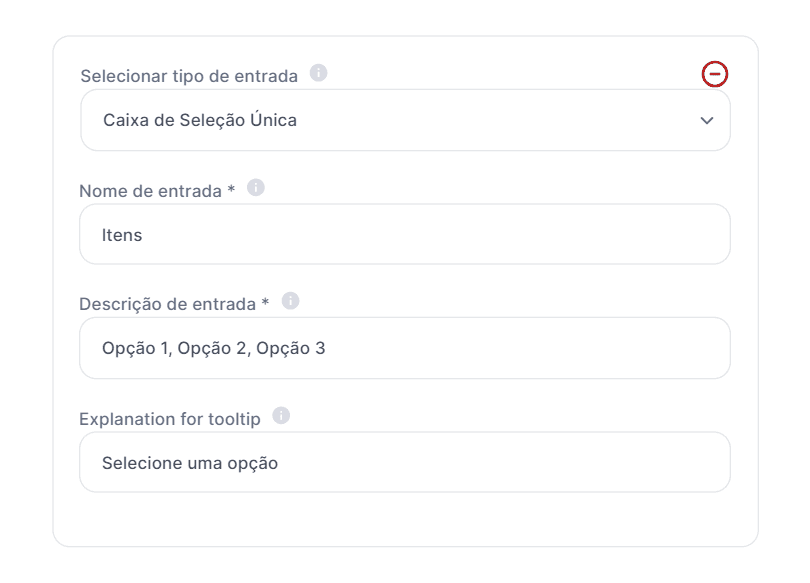
Single checkbox: if you want to limit the user's response to one of a list of options, simply enter each one separated by a comma in the entry description.

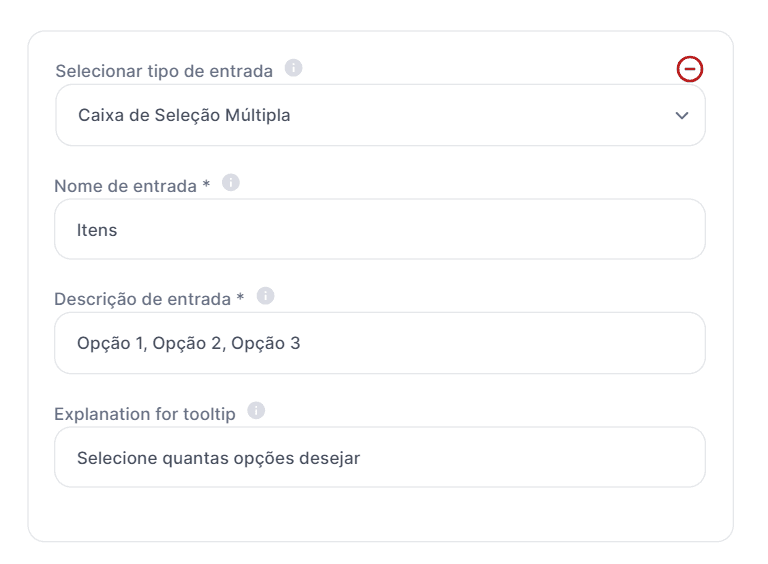
Multiple selection box: now, if you don't want to limit the user's response, create a list of options, inserting each one separated by a comma in the description of the entry. The user will be able to choose more than one option.

3 - Inserting Steps - Advanced

If you want to create complex templates with more than one step, you can use "Advanced Steps" for this. Now, if this is your first time creating a template in Tess, skip to the next item.


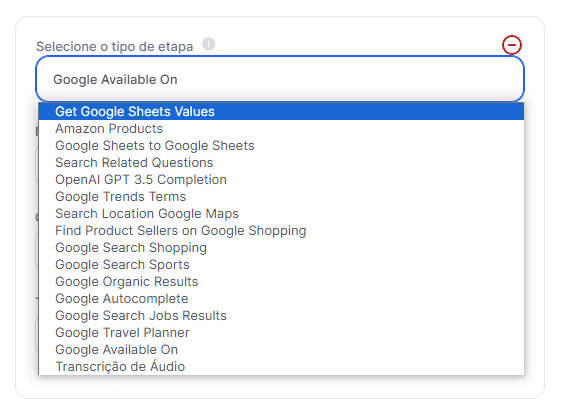

Get Google Sheets Values: obtains data from a Google Sheets matrix defined by you.
Amazon Products:searches Amazon and returns the products to the template.
Google Sheets to Google Sheets:uses data from a Google Sheets spreadsheet that you define and triggers a command for Tess to generate a result for each row.
Search Related Questions: performs a Google search and brings up data on related questions.
OpenAI: a new step for obtaining the result of a prompt. It can be used, for example, to translate input groups.
Google Trends: makes a query for a specific term in Google Trends. It can bring up Geolocation data, Temporal data and Weekly Average, for example.
Search Location Google Maps: performs a search on Google Maps and obtains data on businesses in the region.
Find Product Sellers: searches Google Shopping and obtains data from sellers of a specific product
Google Search Shopping: performs a search on Google Shopping and obtains data on the first players located.
Google Search Sports: provides data and a specific team with match information.
Google Organic:performs an organic search on Google.
Google Autocomplete: uses Google's intelligence to obtain larger searches that are normally made from a smaller term.
Google Jobs: fsearch for jobs on Google.
Google Travel Planner: searches for destinations and price lists based on a city of origin.
Google Available On: faz a Google search for a movie, series or song to get data on where the content is available.
Audio Transcription: analyzes an audio file to transcribe its content.
Pareto is bringing more and more connections so that the sky is the limit when building your automations. All these steps will be elaborated in another article.
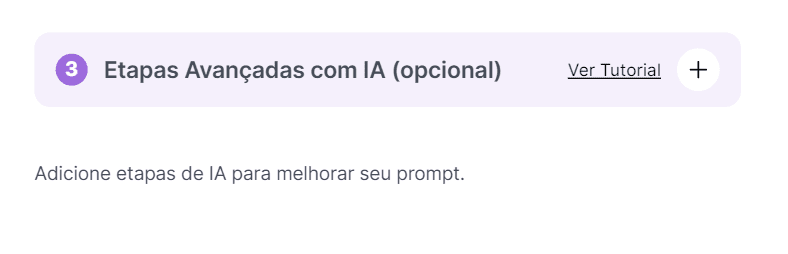
But for the creation of this template, it will not be necessary to add other steps, so this field will be removed and should be left in another way. See the description below.

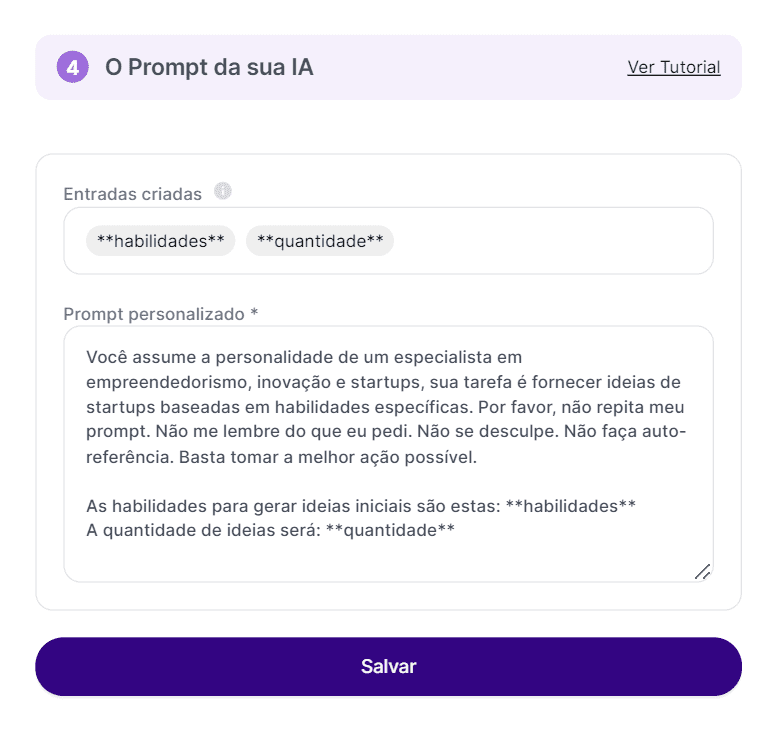
4 - Ending the Prompt

This is the final stage in the creation of your AI model, where you'll put in the command that the AI should carry out.
The Created Entries are the elements that the user entered in step 2. User Inputs. If you used item 3. Advanced Steps, they will also appear here.
This way, you can just insert the tested Prompt and use the Entries created for customization, as in the example:

Review
Once the template has been created, it will be reviewed by the Pareto team who, if they find no discrepancies, will approve it for use.


But you can use it and test it while it's being approved. Just click on the link provided by the Tess AI platform.
The example template for this article looks like this:

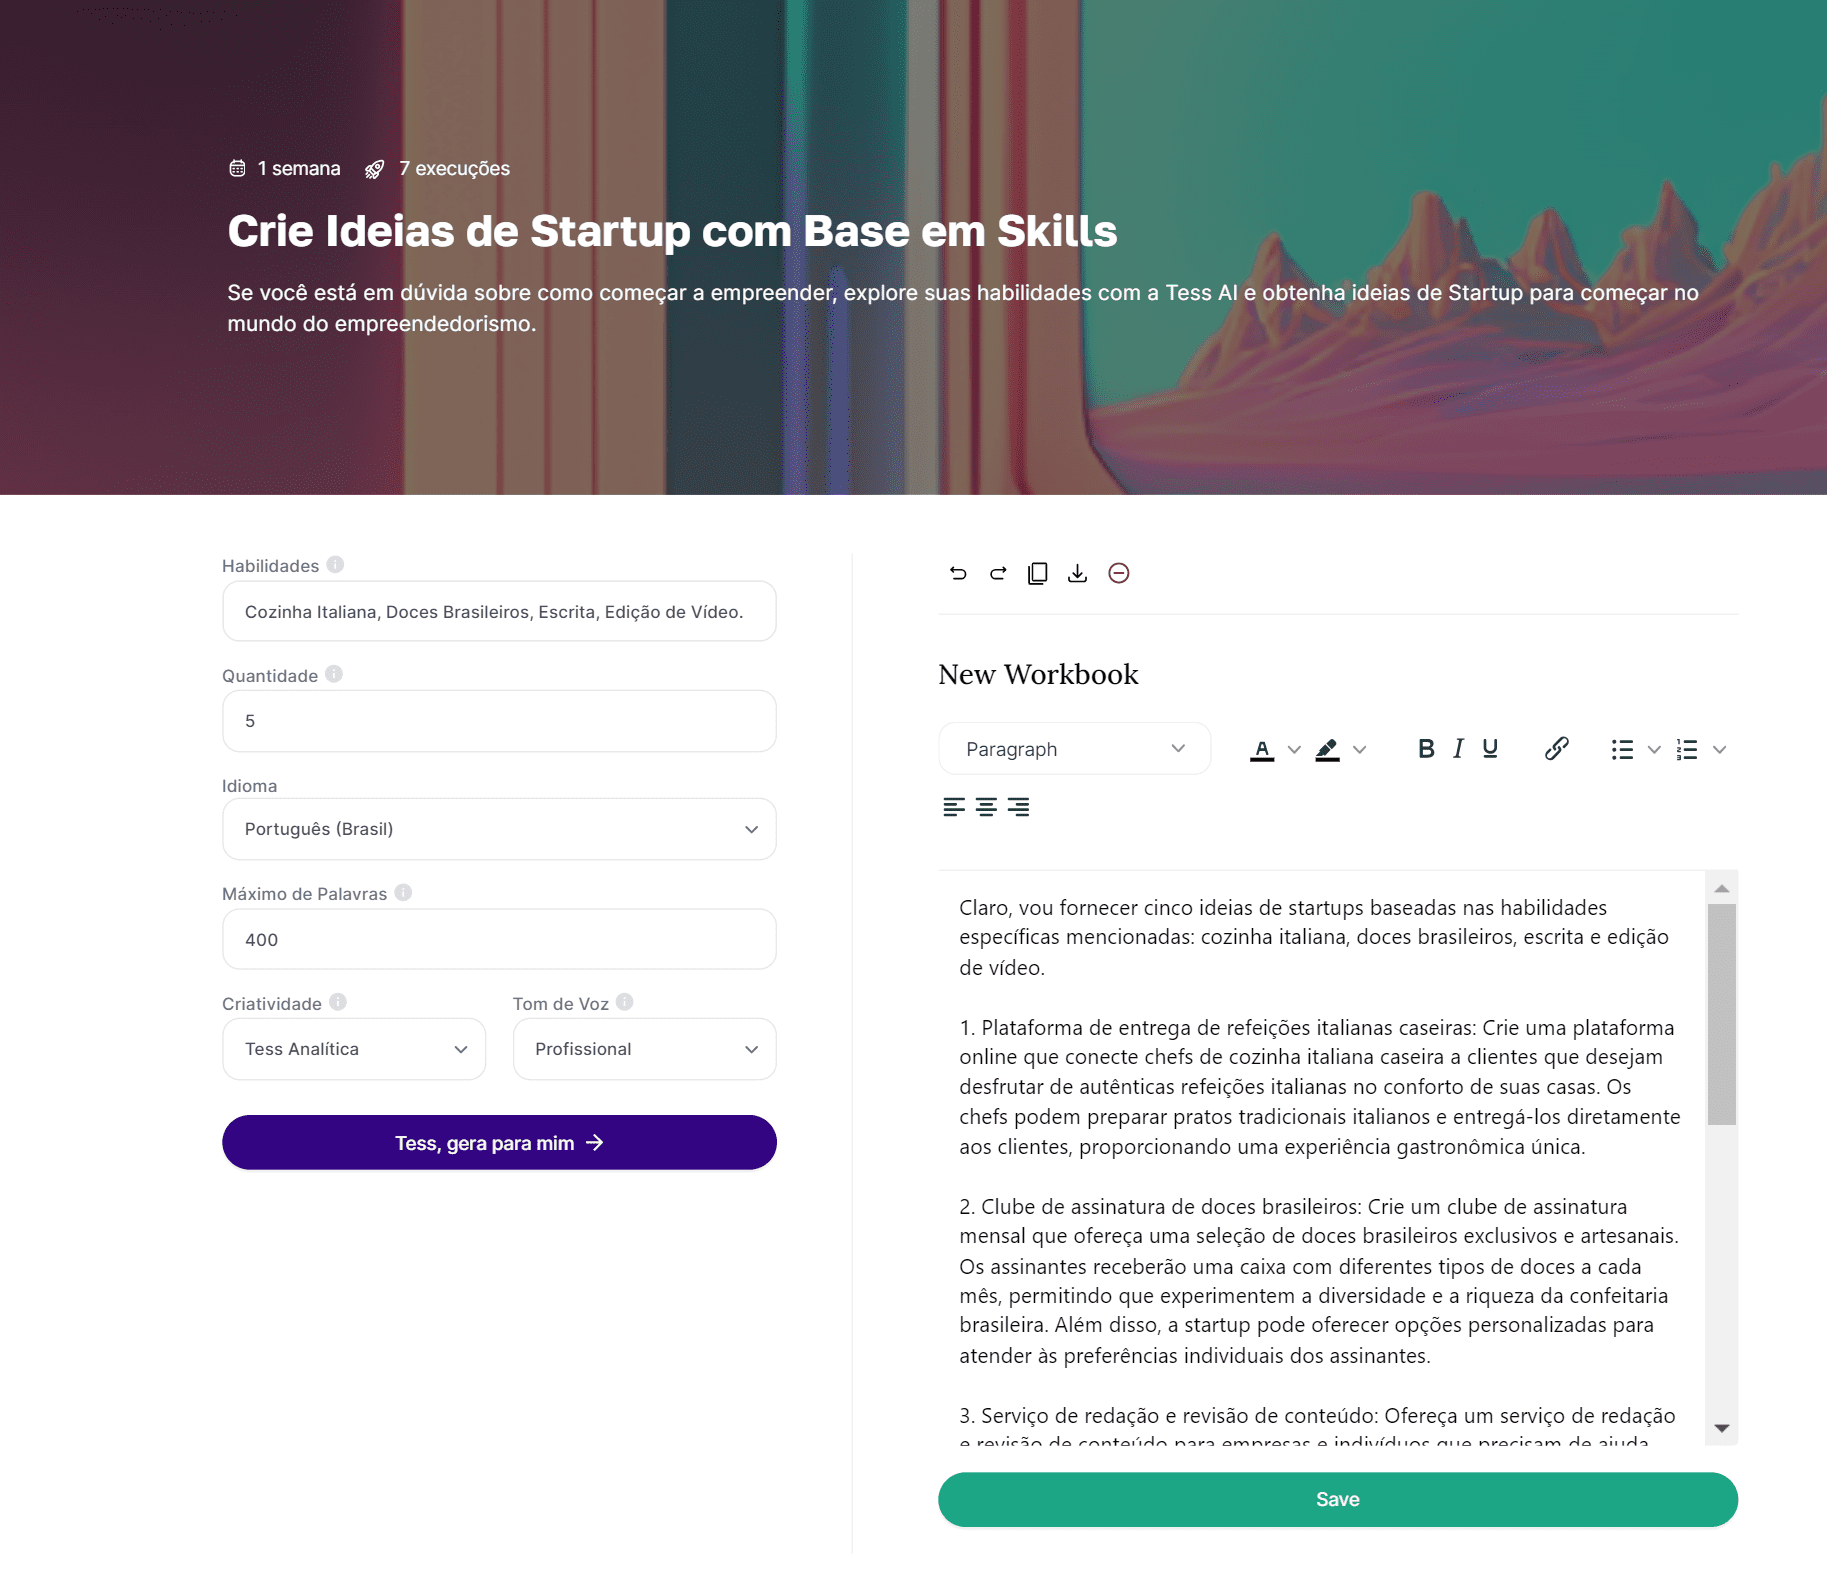
Try Creating Your Own AIs
This tutorial marks the beginning of your journey with Tess AI. You are now equipped with the skills to design your own AIs and automations, connecting to leading platforms such as ChatGPT, Lllama, Bard, Dall-E and MidJourney.
Keep exploring and collaborating with our growing community of over 100,000 users. Your creations have the potential to stand out and soon you'll be able to monetize every time someone uses your AIs.
Be sure to follow our updates and resources as we continue to expand new possibilities. Thank you for choosing Tess AI as your partner on this exciting journey!
_
Don't have an account? Try Tess AI for free.
Want to know how to create image templates? Visit the article: Create Your Image AI with Tess AI.


: O Que É, Aplicações e Exemplos")
